🌟 Introduction to Checkout
The 1buy.io widget allows you to seamlessly integrate your products into your website or application. This widget handles the checkout process and supports both fiat and cryptocurrency payments. Follow these steps to embed the widget.
Access the Dashboard
Log in to your 1buy.io account:
- Development Environment → https://dev.1buy.io
- Production Environment → https://app.1buy.io
Navigate to the Blueprint section in the dashboard.
Prerequisites
Before embedding the widget, ensure the following:
Deploy Your Blueprint:
Your blueprint must be deployed. If not, refer to the Deploy Blueprint Guide.Obtain Your API Key:
Use the Get API Key Guide to generate your Development or Production API Key.Identify Product IDs:
Make sure you have the Product ID(s) for the products you wish to embed.
Steps to Embed the Widget
Step 1: Basic Embed Code
To embed a single product, use the following code snippet:
Development Environment
<iframe
  src="https://checkout-dev.1buy.io/buy?product_id={{PRODUCT_ID}}&api_key={{API_KEY}}"
  width="780px"
  height="540px"
  title="1buy.io Checkout"
  frameborder="0"
/>
Production Environment
<iframe
  src="https://checkout.1buy.io/buy?product_id={{PRODUCT_ID}}&api_key={{API_KEY}}"
  width="780px"
  height="540px"
  title="1buy.io Checkout"
  frameborder="0"
/>
Replace the placeholders:
PRODUCT_ID: The unique ID of the product you want to embed.API_KEY: Your Development or Production API Key.
Step 2: Embed Multiple Products
If you want to include multiple products, use the product_ids parameter to list them, separated by commas. You can also specify the quantities of each product using the quantities parameter.
<iframe
  src="https://checkout.1buy.io/buy?product_ids={{PRODUCT_ID_1}},{{PRODUCT_ID_2}}&quantities=1,2&api_key={{API_KEY}}"
  width="780px"
  height="540px"
  title="1buy.io Checkout"
  frameborder="0"
/>
Replace the placeholders:
PRODUCT_ID_1,PRODUCT_ID_2: The unique IDs of the products you want to embed.quantities: A comma-separated list of quantities for each product (e.g.,1,2means 1 of Product 1 and 2 of Product 2).API_KEY: Your Development or Production API Key.
Step 3: Add Parameters
Customize the checkout process by adding optional parameters to the iframe URL:
| Parameter | Description | Example |
|---|---|---|
product_id | [Mandatory if product_ids is not used] The unique ID of the product you want to embed. | product_id=prod123 |
product_ids | [Mandatory if product_id is not used] Multiple product IDs, separated by commas. | product_ids=prod123,prod456 |
quantity | [Mandatory if quantities is not used] The number of items being purchased (used for single product). | quantity=3 |
quantities | [Mandatory if quantity is not used] Quantities of each product, separated by commas. Must match the order of product_ids. | quantities=1,2 |
first_name | User's full name (3 to 69 characters). | first_name=John |
last_name | User's full name (3 to 69 characters). | last_name=Doe |
full_name | User's full name (3 to 69 characters). | full_name=John Doe |
date_of_birth | User's date of birth in DD/MM/YYYY or MM/DD/YYYY format (for the USA). | date_of_birth=01/01/1990 |
email | User's email address. | email=johndoe@example.com |
phone | User's phone number. The + is optional for the country code. | phone=+1234567890 |
mode | The mode of operation: fast, web2, or web3. Default is fast. | mode=web3 |
custom_id | A custom order ID used to track the transaction. This can be your identifier to track your customers. | custom_id=order123 |
lang | Language for the widget interface: en for English, fr for French, ja for Japanese, es for Spanish, etc. | lang=en |
campaignID | A unique campaign ID for tracking purposes. | campaignID=campaign123 |
utm_source | A UTM parameter to track the traffic source for the transaction. | utm_source=google |
redirect_url | URL to redirect the user after a successful transaction. | redirect_url=https://yourwebsite.com/success |
fail_redirect_url | URL to redirect the user after a failed transaction. | fail_redirect_url=https://yourwebsite.com/fail |
redirect_page | How the redirect happens: new for opening in a new tab, self for redirecting in the current tab, parent for the current integrated page. Default: new. | redirect_page=new |
wait_time | Enables a delay before redirecting the user after the transaction. Accepts yes or no. If yes, it waits for the time specified in custom_time or defaults to 5 seconds. | wait_tume=yes |
custom_time | (Optional) Sets a custom delay duration (in seconds) before redirecting the user. Only applies if wait_time=yes. | custom_time=10 |
webhook_wait | Wait for the webhook response before redirecting: yes or no (default: no). | webhook_wait=yes |
state | Alpha-2 code of the USA state. | state=CA |
country | Alpha-2 code of the country. | country=US |
city | City of the user. | city=Los Angeles |
street | Street of the user. | street=new street |
postal_code | Postal code of the user. | country=12345 |
Example Use Case Embed a Single Product with Optional Parameters:
<iframe
  src="https://checkout.1buy.io/buy?product_id=prod123&api_key=abc123&full_name=John&date_of_birth=01/01/1990&email=johndoe@example.com&phone=+1234567890&mode=web3&redirect_url=https://yourwebsite.com/success&fail_redirect_url=https://yourwebsite.com/fail&lang=en&custom_id=order123"
  width="780px"
  height="540px"
  title="1buy.io Checkout"
  frameborder="0"
/>
Modes of Operation
The 1buy.io system offers three distinct modes of operation to cater to different application needs and user preferences. Below is a detailed explanation of each mode:
Fast Mode (Default)
In Fast Mode, the system automatically creates a user account based on the provided email address. This mode is ideal for scenarios where quick user onboarding is required without requiring users to manually enter their information.
- Use Case: Suitable for applications that prioritize a seamless and fast checkout experience.
- Key Feature: Automatically generates user accounts for streamlined operations.
Web2 Mode
Web2 Mode allows users to create their own accounts by entering their email addresses. This mode is designed for traditional web applications where users prefer to register themselves.
- Use Case: Best suited for platforms that follow the conventional user registration process.
- Key Feature: Enables manual user account creation with email registration.
Web3 Mode
Web3 Mode is specifically designed for decentralized applications (dApps) and blockchain-based services. In this mode, the system generates a wallet for the user on the Web3 platform, enabling interactions with blockchain networks.
- Use Case: Ideal for dApps and blockchain-integrated systems.
- Key Feature: Automatically creates Web3 wallets for users to interact with blockchain networks.
Choosing the Right Mode
Select the appropriate mode based on your application's requirements:
- Fast Mode: For quick user onboarding and minimal friction.
- Web2 Mode: For traditional applications with manual registration workflows.
- Web3 Mode: For blockchain-based services requiring Web3 wallet integration.
Step 4: Generate Widget Hash Code
The Widget Hash Code provides a secure and customizable way to embed the widget with a unique hash. Follow these steps to create and use the hash:
Example Hash Code
<iframe
  src="https://checkout.1buy.io/buy-nft?hash={{HASH_CODE}}"
  width="780px"
  height="540px"
  title="1buy.io"
  frameborder="1"
/>
Testing the Widget
(https://app.1buy.io/products) > Products > Preview
 Here’s an example of the iframe code to embed a specific product:
<iframe
  src="https://checkout.1buy.io/buy-nft?product_id={{YOUR_PRODUCT_ID}}&api_key={{YOUR_API_KEY}}"
  width="780px"
  height="540px"
  title="1buy.io"
  frameborder="1"
/>
Development Testing
- Use your Development API Key for testing.
- Ensure all products and configurations are correctly set up in the Development Environment.
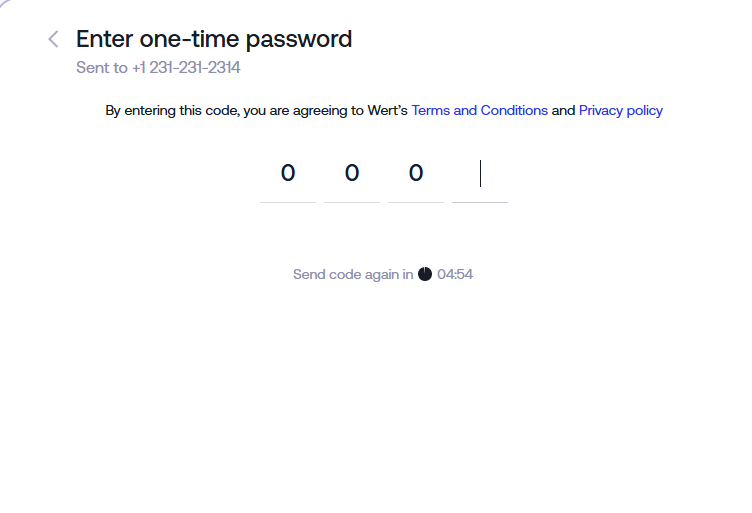
- During the checkout process in Preview Mode (👁️ icon), always use 0000 for OTP verification.
Simulated Transaction Responses
You can use any card number and expiry date, or generate one on this site. The response you receive for simulated transactions depends on the CVV you are using. The following responses are available:
| Response | CVV |
|---|---|
| General failure | 400 |
| Declined by issuer | 401 |
| Incorrect card details | 402 |
| Transaction limits exceeded | 403 |
| Insufficient funds | 404 |
| Incorrect CVV | 405 |
| Failed card validation (card deleted) | 406 |
| Failed card validation (contact support) | 407 |
| Success | Other |
Billing Address
You can use any billing address
Simulate Transactions
- Test the checkout flow, including success and failure scenarios.
- Verify the functionality of redirect URLs (both success and failure).
- Confirm that all optional parameters (e.g.,
full_name,email, etc.) work as expected.
Next Steps
Monitor Transactions
- Use the Transaction API or Webhook to track payments and transactions in real-time.
Optimize User Experience
- Refine the success and failure redirects to provide a smooth and seamless checkout experience for your users.
- Test the flow on multiple devices and browsers to ensure compatibility and responsiveness.